

Moving into a new flat is great – especially when it’s brand, brand new. You have a complete blank canvas – a fresh start – and an opportunity to get creative. However, after the stress of moving and settling in, it can be hard to find your starting point when you eventually get around to decorating.
For us, we knew we had to do something with our bare walls. Having rented for years, it was a bit of an intimidating task. We knew we could do more than just reach for the Command Strips and put up a temporary display with what we had. Plus there was the sheer mounds of pieces we had accumulated over the years, which were basically gathering dust under the spiral staircase in our rented Peckham flat.
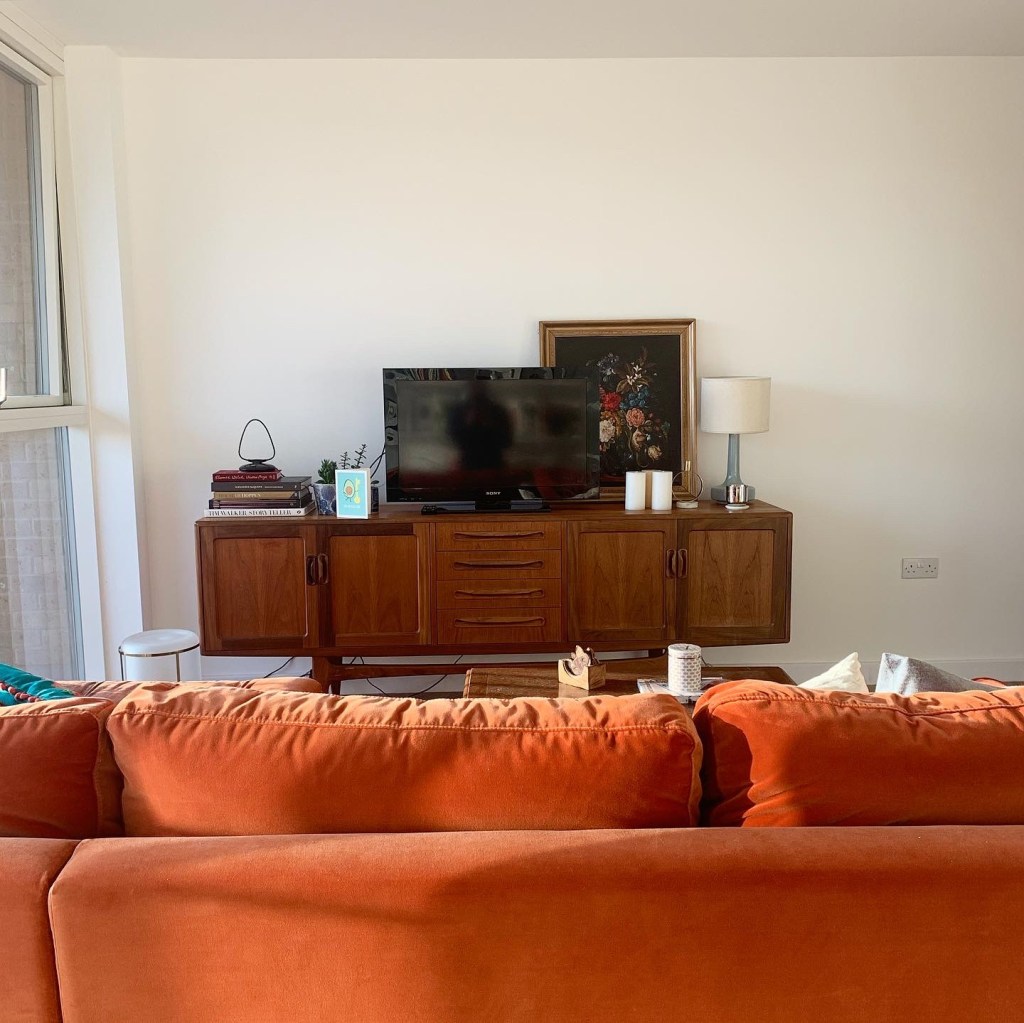
So, once we’d done the important things like buying a bed and sofa, we knew the huge wall in our lounge needed some love. It was staring back at us from behind the TV, devoid of personality and somehow we became blind to it (maybe it was the Sex and the City binges…). So just like Carrie’s big decision to head to Paris with the Russian, it was time for a change.
Looking to add art to your walls? Here’s what we did and how you can create your own gallery wall at home…
Step 1
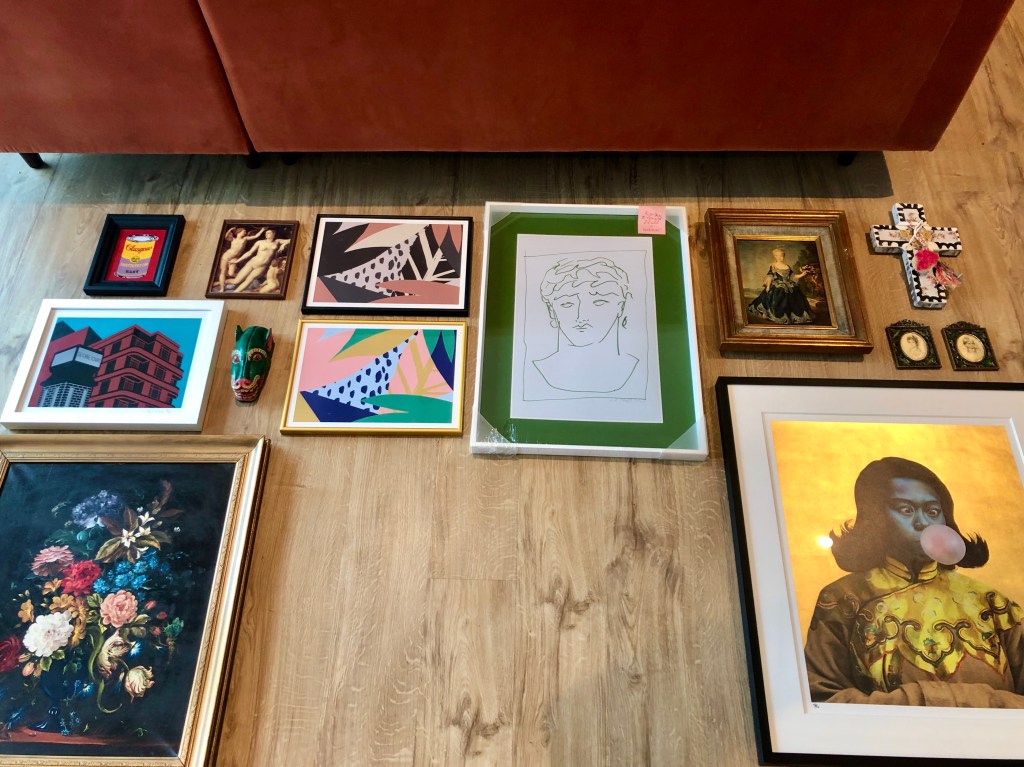
Take stock of what you’ve got.
We had lots of pieces in the aforementioned dust-gathering pile. Whether it was from flea markets, trips abroad or from family homes, we wanted to make sure we did each individual piece justice, but also to create a cohesive look. So, in order to get your ducks in a row, lay everything your considering to put up on the wall on the floor. Measure the wall space that you’re using to get a sense of how much wiggle room you have. We knew we wanted to fill the space above the sideboard so we blocked out that space on the floor – and then we played the most intense game of tetris.
Step 2
Balance your art mixing large and small pieces.
We found that it was easier to place the larger pieces first and work around with the smaller ones. We have three larger statement prints so, to avoid a headache, these were the first to go down. Then we sorted the art in terms of size to fit into different spaces. At the same time, we mentally cross-referenced the colour palettes so it would make a statement on the wall, without being too hap-hazard. Lastly, we took an all-important photo of the finished layout, so we wouldn’t forget!
One thing to remember is that you can always go a bit rogue when you come to nailing into the wall and you may find you want to change your mind at the last minute.
Step 3
Safety first.
Now it was time to do something that felt so unnatural, so naughty and so wrong that we almost couldn’t face doing it – putting that first nail into a wall. Luckily, to aid our anxiety, we went to the guru of gallery walls, Lisa Dawson, and her amazing 10-steps-to-the-perfect-gallery-wall post. It was here we got the advice to pick up these gold hanging hooks – which we found on Amazon – to get cracking. We also invested in a spirit level and cracked out our Ikea FIXA set – which has been the core of all of our DIY projects so far. So, armoured with a tape measure, we got hammering.
Step 4
Weigh it up.
The hook selection we had at our disposal meant that we could pick and choose how many and how big we wanted the support to be. For example, our larger Mark Denton print required two of the heavy duty hooks with two thicker nails and the smaller pieces only required one. Rather than go super technical, we used our better judgement with this and it’s worked out well so far (touch hairy wood…).

Step 5
Get nailing.
One by one, we measured, knocked and hung until we had a complete, cohesive look. It was quite daunting to be honest, but it got a lot easier as we went on. Our advice is to be confident, give it a few hard knocks and just hammer.
Use your spirit level to stop anything going too wonky and use your tape measure to get fairly even gaps. With that said, we weren’t too precious with this. Trust us, you’ll get a good sense of how it’s looking. Just take your time and step back after each time you put up a piece of art to see how it’s looking. If you need to move something or do it again, then do. You’ll cover up the last hole with a piece of art so don’t fret!
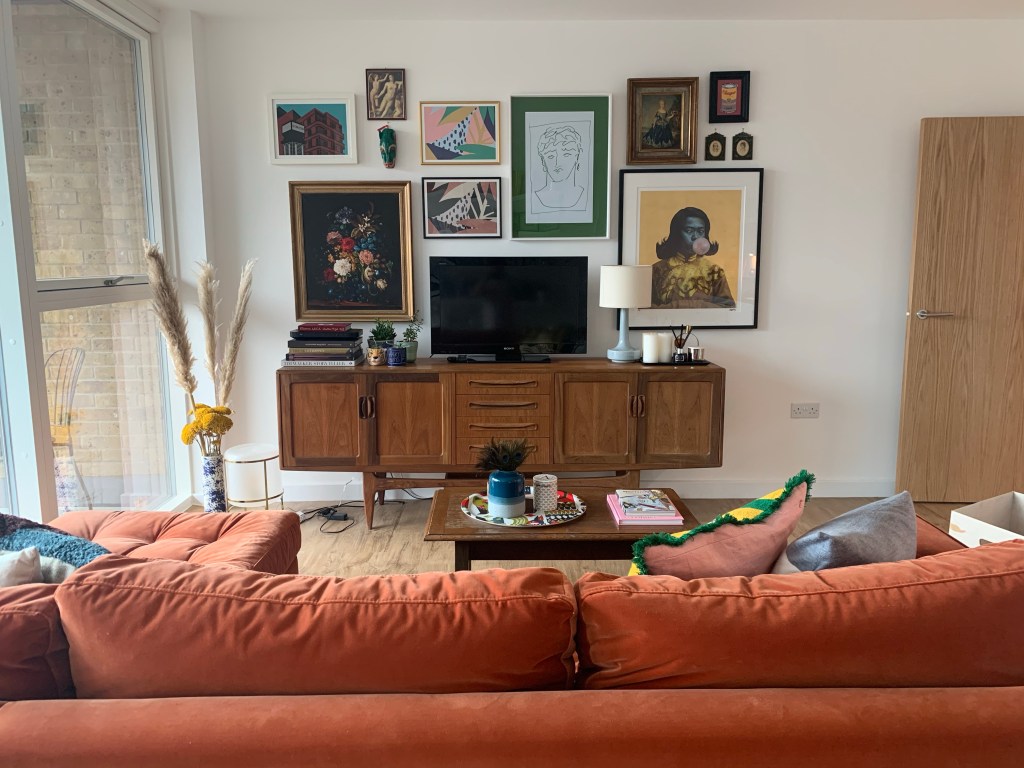
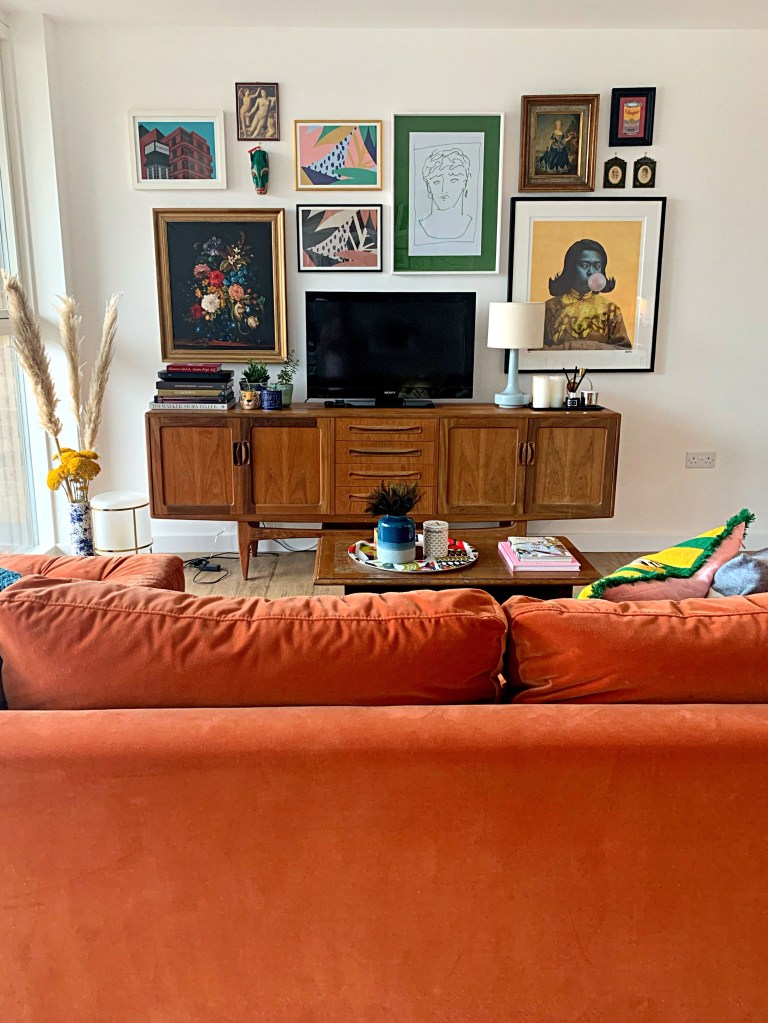
We’re super happy with the finished result. Goodbye boring white wall and hello gallery wall, full of treasures and memories!
Have you been inspired to create your own gallery wall? Let us know any burning questions in the comments below or on Instagram.
It’s time to show off,
David & Mark x

2 replies on “Create a Night (and Day) at the Museum with a Gallery Wall”